

Scanning
There are two options for scanning a document at Thereienstrasse:
- Scanning with the network-scanner
Duplexscanner, only for single sheets - Scanning with a multi-functional device (copier)
Possibility of scanning books
Scanning with the network-scanner
At the printer rooms on the 3rd and 4th floor are network-scanner with a feeder. Operations can be done by using the touchpad.
- Login with your LMU-ID (without the part beginning with "@") and your password. Confirm your entries by pushing the "Enter"-button or the "Login"-button.

If no keyboard is visibly, simply touch the input box.
For special characters and numbers open th menue with the button "123". - Choose "e-Mail".

- Fill in the "To"-Feld.
Either manually or
by choosing an e-mail address out of the address book or the LDAP list by clicking on the arrow symbol beside the "To" input box:


Above you see your address book with the saved e-mail addresses. Push "LDAP List" for searching the address there.


At first set up the searching paramter for the LDAP-list "first name", "last name" or "e-mail address". Then click the "Search Target" box and type the search term in. Start it by clicking the magnifier button.
You can choose one of the hits and apply with "OK".

- Repeat the further step to add more addresses.
- Optional you can name a subject.

- For changing the scan settings push the gear wheel.


In the slide "Save" it is possible to change the file format "PDF" and to turn on/off the recognition (OCR).


Leave the settings with "OK" button. - Insert a document (first page is directed to the rear down). Make sure you are using the right paper format. Start the scan with the "scan" -button on the touchpad or the hardware-button "Scan".
- If the recignition is active, the following message apears. Apply this with "OK".

- If the "Scan Viewer" is active, you will get a preview of the scan.

By choosing "Scan More" you can add another document to the e-mail.
Send it to your e-mail address with the "Send"-button.

- You will get back to the main menu. There you can start a new scan session or leave the device with "Logout".

Apply yor logout with "OK".

-
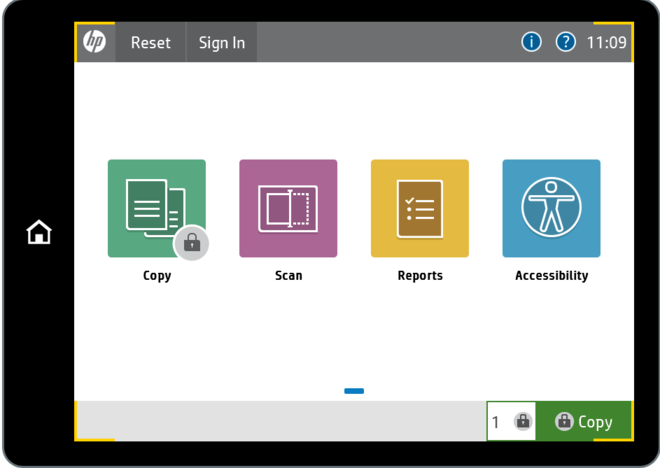
Scanning with a multi-functional device (HP Color LaserJet Flow MFP M680)
-
-
First choose the button scan for scanning your document
-
-
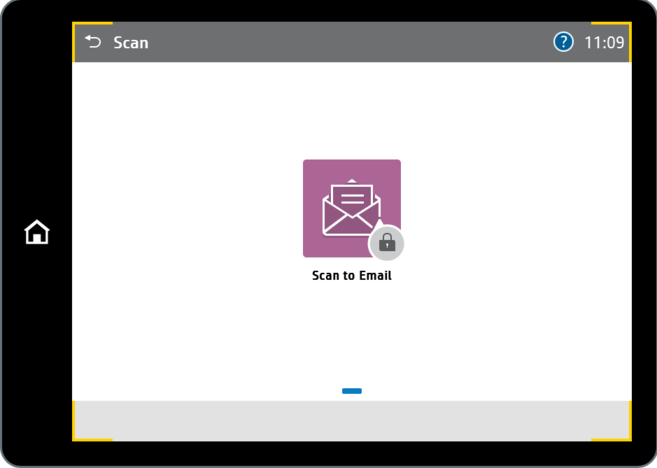
then choose Scan to Email
-
-
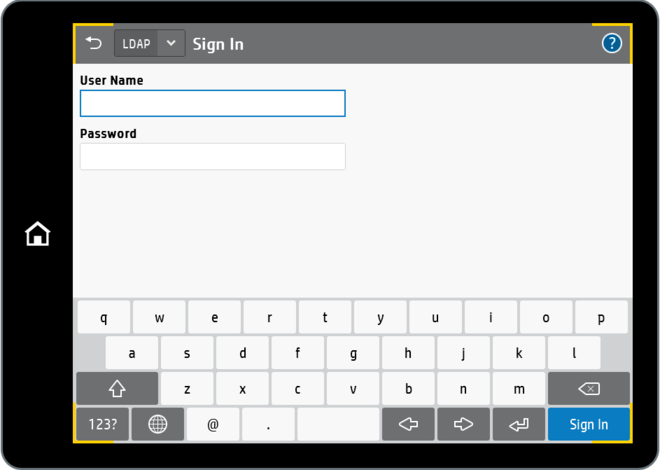
sign in with your LMU User Name and Password
-
-
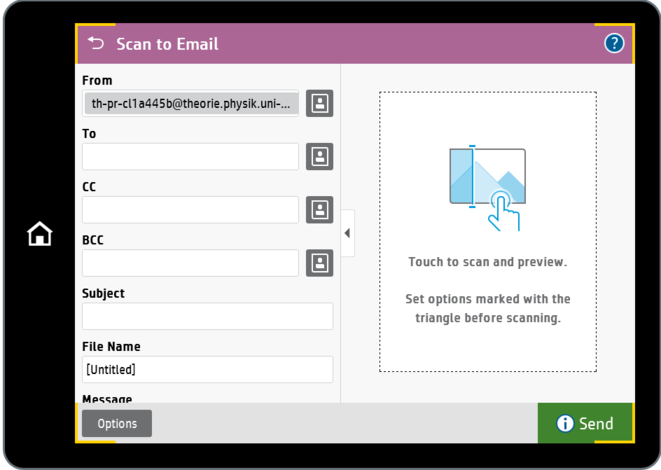
Now you can enter your E-Mail Adress (only LMU E-Mail Adresse possible)
-
with a tap on the left side of the screen you scan your document
-
on the bottom left you send the E-mail
- under Options you can for example choose black and white scan 2-sided scan, resolution